
Quaze wrote:
This is insanity 😄😄 If you guys knew how little it would take for me to give up and go buy a new VB, you’d be laughing right along with (or at) me. 😄
Thinking that a “new” VB is guaranteed to work, while not insanity, is at least naivety…
Even VBs that were never opened and sat perfectly still in a shipping container for over a decade exhibit the display problems. It’s inherent in the design, and this kind of cable bypass or the (relatively much easier) standard solder fix are the only ways to make sure the glitches don’t return.
How many easily reparable VBs have you thrown away? 😛
If it’s connected to a computer, you could have it scrape the PVB news, forums, and even the high-score lists.
Addendum:
I just found out about this: http://www.apsx.com/APSX-PIM-s/110.htm
Anyone have an extra ten to fifteen grand kicking around? 😛
As near as I can tell, you still need to make molds for this, so you have to add the cost of a CNC or manual milling machine (unless you want to carve them by hand).
BTW, I’m guessing that “removed from a working VB” is just boilerplate meaning “these parts are known to work” (which doesn’t really make sense in the context of a piece of clear plastic, but whatever…)
OT: Why is that guy pulling plastic parts off of working VBs?! Also, that price is ridiculous.
I have already made accurate 3D models of these. If anyone has experience working with CNC-machined injection molds (or with the companies who produce said molds and plastic parts therefrom), I can send you the file and we could get some reproductions made.
I was actually thinking once of seeing if a local art-glass studio would be able to make glass versions of them, which would be much more sturdy and scratch-resistant (but also quite expensive, of course; though maybe not even as expensive as the ones from that eBay lunatic :-P).
If the cables are in good shape, you don’t really need to go to all that trouble. Soldering the existing cables is not too difficult, if you know your way around a soldering iron (which it sounds like you do). It’s certainly more difficult than soldering normal wires to PCB pads (not to belittle your modding work), but not much more so.
HP Lovethrash and I were planning on releasing a “how-to” of sorts, but he’s very busy and doesn’t seem to be getting around to it very quickly, so I might be able to put something up this week some time. In the meantime, you might want to take a look at the hardware involved and think about the problem a bit. Feel free to ask questions in this thread, and I or one of the other display solderers can probably help you out.
On the other hand, depending on how valuable your time is, you may just want to have it “professionally” done…
KR155E wrote:
…I hope you can find some lenses which work well, clonecman…
A good place to start would be the cheap lenses made for the “cardboard VR” sets that are all over eBay. Or, if you’re blessed with a Rift devkit, you could try the lenses that come with it (I understand it comes with some of various diopters).
I just watched part 2 where he makes a head-mounted VB by basically throwing out most of the focus/IPD adjustment hardware and attaching the rest to the headband from a face shield.
clonecman wrote:
I just watched Ben Heck’s part 2 Virtual Boy video and I was wondering, would there be a possible way to mod the Virtual Boy and magnify the screen so it seems bigger?
Just putting magnifying lenses between your eyes and the mirrors should do the trick, if you get the right lenses and mount them in the right positions.
Thanks for the compliment 🙂
I just thought of something: you could simply glue the black part on before you undo the screw. If it can’t move, it can’t misalign. Easy peasy.
One drop of a nice, free-flowing (i.e. non-gel) CA (i.e. “Krazy Glue”) in each corner should wick into the gap and hold very well without interfering with the operation of the VB.
litephiter wrote:
So, RunnerPack: messing with the big screws on the mounting plates definitely causes misalignment? Do you think there would be any way to apply one of these clips safely, in that case?
I’ve never taken them off, myself, but I wouldn’t say it would definitely cause misalignment, it’s just likely to (especially if you’re not careful). It might be that if you only remove the one for the clip, the other would hold things tightly enough to not move.
For example, would you be able to keep making small adjustments to the tightness of that one screw until everything was aligned again?
It’s not the tightness of the screw that sets the position. The end-plate which the two screws are there to attach is designed with some play in its vertical, horizontal, and rotational positions. The screws just keep it from moving once the alignment is right. This was done at the factory when the VB was made, then they applied a bit of red (naturally ;-)) epoxy to keep the screws from loosening. If you only loosen one screw and tighten it again without shifting the black plate, it should be fine. You should probably apply some kind of thread-locking compound, too, but it may be fine without it.
litephiter wrote:
From Ben:Oh right. That hook doesn’t print well unless you use support material.
So I printed it solid and used a Dremel to carve a niche into it for the PCB.
-Ben
Ah, yes… good old “additractive manufacturing” 😛
It would have been nice if there was at least some indication left of how deep a groove needs to be cut… Oh, well. Like I said, it seems like wishful thinking, anyway.
I am looking forward to seeing what he does to make the VB head-mountable, though…
That doesn’t look like the one on the video, or even like it will actually work… The one on the video had a little hook on the side opposite the hole so it would hook under the board and act like a lever.
There’s no evidence that this even fixes display problems. He mentioned that he performed the “oven trick” (with a heat gun; which requires even more care to avoid messing up the cable than does an oven) multiple times before it was fixed, so the clip might not be doing anything at all.
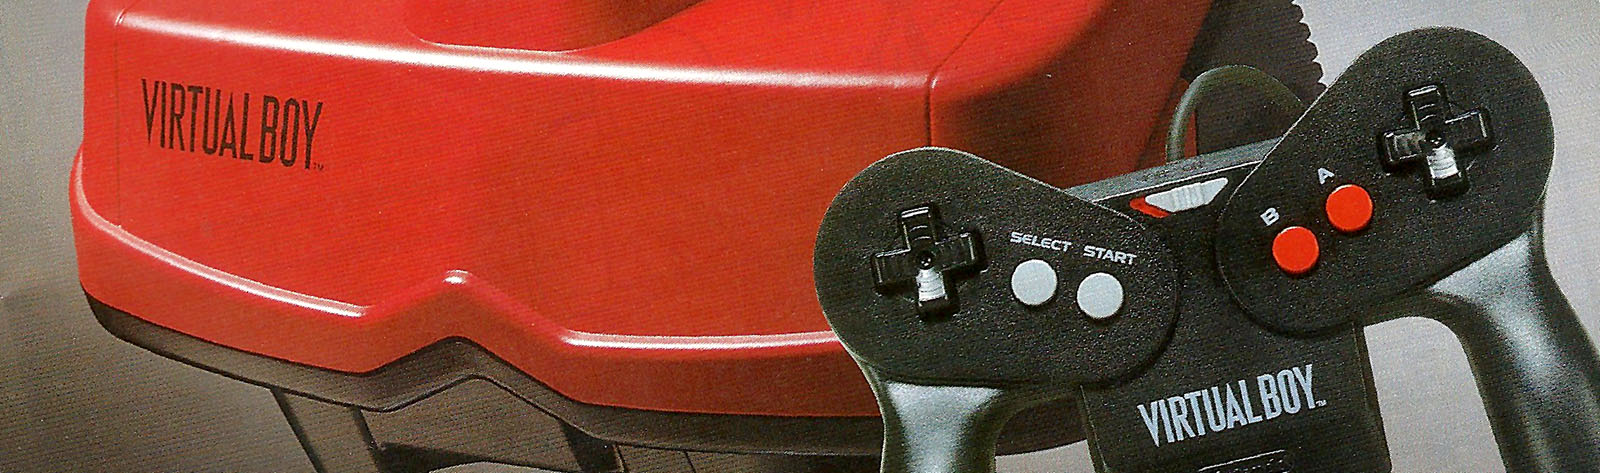
I don’t like how he uses one of the screws that hold the display PCB mounting plate on, either. If you take these screws out, you risk misaligning the display PCB and causing blurriness which may lead to actual headaches (unlike the imaginary ones for which the VB is infamous).
Attachments:

IOwnMyWiiULEGIT wrote:
Okaayyy. So I took a look at the available software on PVB to download for composing and to say the least, I am absolutely confused. lol While searching for answers, I had the good opportunity to chat with a nice person by the name of DaVince who had all sorts of good recommendations and advice as far as the limitations regarding composing for the system and the available software to do so. The answers were um, how do I say- bleak. It doesn’t come as too much of a surprise considering the nature of the VB, so now I am wondering if there’s anything I can do to help with this situation. I have zero experience coding, but I’m intrigued to help try and build a proper audio engine (is that the right terminology?) for this interesting and obscure system. I mean, if there’s one already out there I don’t want to go about trying to reinvent the wheel, you know?Thank you for reading and all the best.
There are already a few music and audio playback “engines” for the VB, both publicly released and in development. I don’t know of any music composition tools (i.e. trackers), but there are converters for both MIDI and Mod (actually, Impulse Tracker) files.
The most powerful (and, thus, most difficult to use) tool would be DogP’s VBSG, which is basically a VSU simulator that takes a script containing VSU settings (and time delays) and produces either a WAV file of (a close approximation of) the sound the VB would produce, or C source code that can be compiled and run on the VB to control the actual VSU. Using it to compose music would be tedious, at best, but it (or its source code) could be used as part of a larger tool or suite of tools.
Since the VSU is essentially a superset of the GB and NES audio hardware, it would, in theory, be possible to use any tool designed for those systems for VB music creation, given the ability to convert its output for playback on the VB. If there are any open-source tools of that nature, perhaps one could be modified for VB use.
Maybe this thread will get other chiptune composers intrigued by the VB and we can get some kind of collaboration started…
Given that it doesn’t seem to be parallel to the path of the mirror, that kind of rules out bad displays or dust/lint on the lenses or mirrors.
I’m going to go with a crack or scratch in the red window. Does it move relative to the image when you move your head? You should be able to light the window using a flashlight (with the VB off) and see if it’s there. Try shining the light across the window, from the sides.
No worries. I hope you found what you were after. If you have any specific questions about how something works, be sure to ask (I’m always interested in finding areas of the docs that can use improvement).
With the exception of a small handful of talented individuals working on games, hardly anyone is making chiptunes for the VB, so I can’t wait to hear what you come up with!
Oh, yeah… welcome to the community 🙂
This is not meant to sound rude or insult you in any way, but, have you tried looking around the site? I mean, I know you’re new, but it’s quite nicely laid-out and easy to navigate.
There is a section listing nearly every homebrew game released, so far (a search or browse of the forums will reveal ones currently in development). There is a tools section with a subsection just for audio and music utilities. There’s a documentation section with (probably) everything you want to know. There’s even a development wiki where members can post (and have posted) things they’ve found out about the VB.
The short(-ish ;-)) answer to your question is that the chip is called the VSU and is completely custom (which is not surprising for a Nintendo system). It’s an arbitrary waveform synthesizer with five channels, plus one LFSR random noise channel. The “instruments” each consist of 32 6-bit samples. There is room to store five such waveforms at once, and they cannot be changed while the VSU is actively using them. Channel 5 has additional sweep and modulation features.
Alexander wrote:
The Japanese or USA adapters would need a step down converter to avoid blowing anything out in the system. Really not worth it.
Pro-Tip: you don’t need an adapter that takes 100/110v in, you just need one that puts out 6-13VDC (and has the right plug for your adapter tap).
If you get the Japanese adapter tap, you just need an AC adapter that can do 6-13V, with a standard 2.2x5mm barrel-plug with (I think) negative on the tip (someone confirm this for me; I don’t own the tap), you should be good to go.
To bring it back around to HMDs, while also talking about projectors, has anyone else been following the CastAR system?
It consists of two projectors mounted to a pair of shutter glasses. It projects a stereoscopic image away from the viewer, which bounces off of a piece of retro-reflective material, resulting in an image only you can see. Other people wearing one and looking at the same retro-reflector will only see their own image. Your head is tracked, so the scene appears to exist in the real world (hence the term “augmented reality”).
I hope it doesn’t end up as vaporware, because I really want one (or a few, so I can play with friends and family).
Wow, can’t wait to try this tool! Very interested in how it fills the voids left by the parallax shifting.