

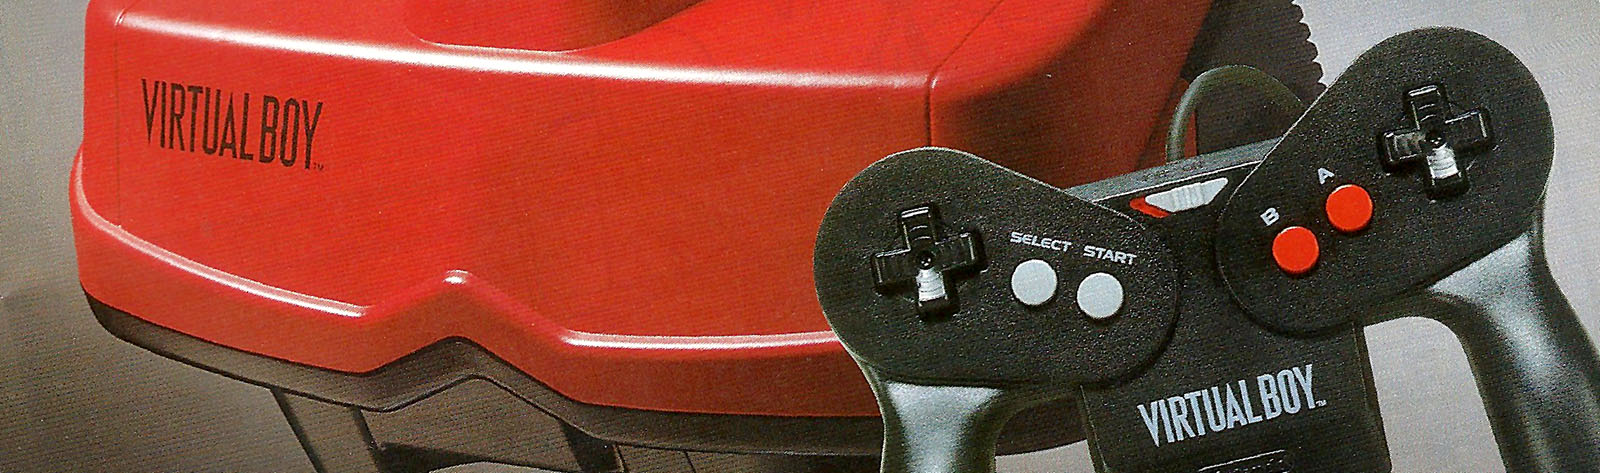


There’s two different ways I’ve done a mouse w/ the VB… the first (and easiest/most accessable to everyone) is using the SNES mouse from Mario Paint, which is hardware compatible, and just requires a software read (since you need to read 32 bits rather than the 16 that the hardware read does).
The second is using the Parallax Propeller microcontroller. Here’s the thread on that from a little while ago: http://www.vr32.de/modules/newbb/viewtopic.php?topic_id=3566&forum=2 . I really like this method because it allows tons of different peripherals, one of which is the mouse (standard PS/2), but also Playstation 2 controllers, Wii accessories, keyboard, and whatever else you want to interface to it.
And yeah, 3D pong is pretty lame w/ the regular controller. I set the right D-Pad to be fast move, left for slow move, and both for even faster… but it’s kinda awkward. The PS2 controller is better, since you can use the analog stick for variable speed, but even better was the analog stick position was the actual position of the paddle. But overall, the mouse was the most natural. I was thinking about trying the Wii Nunchuck with the stick to move, and swinging to do hit power (using the accelerometer values), and maybe spin, but I never got around to it.
DogP
Heh, this seems to be a very popular thread 😛 . Anyway, for those that don’t have the hardware to try it out, or are just too lazy (I don’t blame you… by itself, the demo is nothing exciting), here’s a wav recording of it. Unfortunately, with how Allegro handles sound, I don’t think RB will ever be able to play this kind of sound without a complete sound processor rewrite.
On an unrelated note… in the long term, I think that’s exactly what RB needs, since the currently unsupported modes are likely going to stay that way since Allegro can’t natively support them (easily at least)… but I definitely don’t feel like writing a sound core for it.
Oh… I’m not sure if I ever explained the idea of making this work. Basically, I load the waveform RAM with a DC value of max amplitude. This by itself this creates no sound. How it creates the sound is by using the volume control of the channels to write the amplitude of the sample, in effect creating the AC waveform. Unfortunately, there’s only 4 bits of amplitude, so you don’t have a lot of resolution. The output is AC coupled, so I use an amplitude of 8 as my 0, and swing +/- from there.
More resolution should be possible by using a second channel with a lower amplitude DC value in waveform RAM (using two waveforms and channels rather than one). If you make it a ratio of 16:1, you could actually get 8 bits (upper 4 bits on waveform 1, lower 4 bits on waveform 2), but unfortunately the waveform RAM is only 6 bits (0-63), so that’d mean your second waveform would only be a value of 3.
This may or may not be too small to make a difference (I dunno if too much resolution will be lost in the output calculation). It’s worth a try, and if that doesn’t work, you could use more channels of equally weighted amplitude to double the resolution for each channel added (5 channels w/ equal waveform would give 8 bits). That is a simple solution, but wastes channels, so no music could be playing while the wav is playing.
DogP
Attachments:
Not sure about worse, but it’d be a similar style game.
DogP
Heh, that sounds similar to what I’ll probably end up releasing… a while back I started a 3D pong, which used a mouse and link cable. I did convert it to also work with the regular controller, as well as a PS2 controller. But it still has lots of work to go before it’s really a worthwhile game, but hopefully I’ll make it release-worthy so people can at least get a little enjoyment out of it.
DogP
No offense… but that looks like a mess. IMO, I’d make a standard connector that attaches to your uC, and then sell adapters from whatever system to the uC connector. If possible, multiple ports off the same box would be cool (so people only had to buy one USB adapter and several common port adapters to do 2P).
But really… at $35 + $10 for additional ports, that doesn’t seem to really save much money over cheap adapters on ebay or the ones from http://www.retrousb.com . I’m not really sure a hand-built box can really be competitive with cheaply mass produced parts with molded plastic cases.
DogP
Yeah… that is a pretty cool demo. Hopefully he’s planning on turning it into a game. I mean… raycasters are cool, but they don’t really have any lasting enjoyment. He did a great job on VB Racing though, so hopefully this will get similar treatment.
DogP
Okay… attached is v1.0 of wav2vb and the wavonvb sample. It’s pretty self explanatory, but basically just do wav2vb
The wav player (wavonvb) basically initializes the sound for speech, then calls a function that writes (and blocks) until the wav data is written. This could probably be done with an interrupt on a timer if you wanted speech without a blocking call. There’s a #define called SR_DIV, which defines the delay numerator to be divided by the sample rate of the wav file, but it’s not perfect, so it’ll likely need to be tweaked, depending on the sample rate (it only affects the delay in the loop, neglecting the time to actually execute the sound writing).
I’m sure there’s plenty of bugs, but it’s been working for me… but let me know if you have any problems, or feature requests for the next version. I’ll probably try to get more resolution for the next one, which should help the sound quality, but take up more ROM space.
DogP
Attachments:
Oh… it’s just padded, since my flash cart I usually use is 1MB. The data is 11025 samples/sec, and each sample is 4 bits, so it’s a little over 5KB per second. The first Wario one was only 6400 samples/sec, which is only 3.2KB per second. Stereo of course doubles that (the last sound on the second ROM was stereo), and I was doing some thinking on how I could make it sound better, and I may be able to do some tricks to make it more than 4 bits per sample. It’ll take up more space, but should sound much better. V1 will be just what you see here though… for V2 I’ll try some new tricks.
Heh, and yeah, the Kart sounds are some convenient wavs I had laying around from when I was working on my other converter, which as you can tell, didn’t sound nearly as good as this one does. I’ll have to convert the “Mario Kart Virtual Cup” sound to do a side by side comparison.
DogP
I’m not sure… there may be something that can be done, although if you listen to speech in the commercial games, there’s some scratchiness there, so I’m not too optomistic about it. There may be a trick I can do using multiple channels to get more resolution… currently I’m using just a single channel, so I’ll look at the raw waveform on an oscilloscope and see if I can smooth it out.
BTW, attached is one I did completely using the converter. Just press a button to go through the different ones (it just goes through an assortment of sounds).
DogP
Attachments:
Okay… I got the wav conversion app written… I’ll clean everything up and post it tomorrow night.
DogP
I can tell you that the source is perfectly fine… it’s the port to gcc that caused the glitchiness. And I believe I know who did the port to gcc, and if anyone could do it right, it’s him.
Unless you have the ported code, it’d be a HUGE job to get as far as he did, and then you’d likely still have the same problems, which you’d then have to debug… but I assume he tried to debug it as well as he could, which is as good as probably any of us could.
DogP
Hey guys,
I had a few spare minutes to look at this some more… it appears that the big change is between 1.0 and 1.1… the rest of the changes are very minor. 1.1 and 1.1a actually have the same code, with just KYOTU1 (.c, and in effect .o as well) changed… 1.2 looks to just have a few bug fixes added.
Also, here’s a babelfish’d translation of the change log from the last readme:
1.0
First version.
1.1
Message picture and interpupillary distance focus control picture, automatic pause setting picture It tried to indicate the surface and the vertical alignment inspection picture.
1.1a
Correcting the vertical alignment inspection picture.
1.2
At the time of power source throwing, before the message picture comes out, instant strange indication coming out learning/repairing Righteousness. (main.c XPCTRL, was set before the SCANREADY signal waiting.) At the time of the VPU interruption, one time it interrupted and put in state of non- permission. The start address was designated as 0xffe00000. The automatic pause was standardized to the automatic pause.
DogP
mbuchman wrote:
Unfortunately I have misplaced the inside cardboard for my Virtual Boy. But all is not lost, the Virtual Boy game boxes fit perfectly inside the system box, so I store all of my boxes in the system box.I would like to find something to hold my game carts, that would be ideal. Right now they are just loose. I may make a case based off of the Blockbuster case that would also hold game carts.
That’s how I do my boxes as well. My carts are in a divided box, which I don’t remember what it came from, but kinda resembles a 2 row baseball card box.
DogP
Looks good! Kinda makes me want some Skittles though 😉 .
DogP
I don’t have anything against BASIC, but in C (and IMO BASIC as well), the coding style of using goto for everything really shouldn’t be used. It makes the code REALLY hard to follow (hence the name Spaghetti Code http://en.wikipedia.org/wiki/Spaghetti_code ). There’s very few legitimate uses for goto… if everything is in a loop, you can clearly see the structure of the program flow, and know the condition for where it’ll exit the loop.
As far as speed… there’s no reason it’d be faster, and it’d most likely be slower, since the optimizer can’t do things like unrolling loops, since you’re not using them 😉 .
DogP
It’s a good start, but yeah, your coding style is VERY non-C like. I’d recommend using an existing example for the tutorial, or better yet, use an existing example to learn proper C style, then make your own example 😉 .
DogP
Cool… thanks for that link… I’ll have to order one of them next time I order parts.
DogP
Wow… that’s pretty cool… nice job! For some reason that reminds me of the SNES Zelda boss in the water where you get the hookshot 😛 .
DogP
Cool… thanks for posting that video. Couple quick questions… what temp is your iron set to? I was surprized to see with the amount of time the iron was on the cable that it didn’t cause the cable to break at the bend (where the cable connects to the PCB). That was the problem I had when I tried that before. My display may have had more stress there than most, or I may have had my iron too hot though.
Also, what’s the holder that you’re holding the PCB with (model, where to buy, etc)? I keep thinking about getting one of them, but was never really sure if it’d be helpful… but that looks really useful. Heh, and I recognize that exact copper sponge… I love that thing 🙂 .
Also, I may be wrong, but that desoldering wick looks like the cheap stuff from MCM (Tenma)… I’ve got some of that stuff, and if I could make a recommendation, it’d be to get some NTE stuff. I picked some of this up locally: http://www.microcenter.com/single_product_results.phtml?product_id=0206736 , and I can’t believe how much better that stuff works than the Tenma stuff. I always avoided wick because that Tenma stuff didn’t work well, but I bought that NTE stuff when I needed some wick for work, and I was blown away how much better that stuff worked.
And yeah, that doesn’t look too bad, although for comarison, here’s a pic with the FFC eaten away w/ chemicals and then soldered… a little cleaner IMO, but of course more complicated, and if they both work equally well, then it doesn’t really matter 😉 :

DogP
Cool… congrats on finding another VB, and finally getting to play it 🙂 . That burn mark on the cable seems REALLY odd… what were they thinking???
BTW, cool blog… I always like reading random electronics/video game hacks, mods, and other related random stuff.
DogP