
Preliminary English Translations for Page 7 of the Instruction Booklet:
[In the blue bar near the top]
オリジナルモード ・バーチャルモード
Original Mode & Virtual Mode
[Right below the blue bar]
オリジナルモード ・バーチャルモードを選択した後、
パートI、パートIIをL+ボタンの上下で選びAボタ
ンで決定してください。
After choosing Original Mode or Virtual Mode, please
choose Part I or Part II by using up or down on the left
control pad and pressing the A button to decide.
[Beneath the above]
★基本ルール (パートI)
L+ボタンまたはR+ボタンの左右でビーム砲を
移動しA、B、Lトリガー、Rトリガーのいづれかのボ
タンでビームを発射し、せまりくるインベーダーを
迎撃します。すベてのインベーダーを撃ち落とせば1
面クリアです。ビーム砲のストックを失うか陣地を
占領されるとゲームオーバーです。
※L、R+ボタンを同時に押した場合、L+ボタン
の操作が優先されます。
★Basic Rules (Part I)
Move the beam gun by using left and right on the left control
pad or right control pad, and fire beams with any of the A, B,
L Trigger, or R Trigger buttons, in order to intercept the
oncoming invaders. If you shoot down all the invaders, one
phase is cleared. When you lose your stock of beam guns or
when your position is overrun, it’s game over.
※ If the left and right control pads are pressed at the same time,
the operation of the left control pad has priority.
[Above the upper screenshot]
▼タイトル画面パートI
▼Part I Title Screen
[Above the middle screenshot]
▼バーチャルパートI
▼Virtual: Part I
[Above the lower screenshot]
▼ゲームオーバー
▼Game Over
Attachments:

Preliminary English Translations for Page 6 of the Instruction Booklet:
[In the blue bar near the top]
ゲームの遊び方
How To Play The Game
[Right below the blue bar]
タイトル画面でSTARTまたはAボタンを押すとモードセレクト画面になります。
L+ボタンの左右で遊びたいモードを選んでください。
At the title screen, press the START or A button to switch to the Mode Select screen.
Please choose the mode you want to play by using left or right on the left control pad.
[Above the left screenshot]
▼オリジナルモード
▼Original Mode
[Beneath the left screenshot]
オリジナルのスペースインベ
ーダーで遊べます。(パートI
またはパートIIを選んでくだ
さい。)
Play the original Space
Invaders. (Please choose
Part I or Part II.)
[Above the middle screenshot]
▼バーチャルモード
▼Virtual Mode
[Beneath the middle screenshot]
奥行きのあるフィールドで新
感覚のスペースインベーダー
が遊べます。(パートIまたは
パートIIを選んでください。)
Play Space Invaders in a
field that has a new sense
of depth. (Please choose
Part I or Part II.)
[Above the right screenshot]
▼チャレンジモード
▼Challenge Mode
[Beneath the right screenshot]
タイムアタックとスコアアタ
ックの2種類のモードで遊べ
ます。大記録に挑戦してくだ
さい。
Play 2 different modes:
Score Attack and Time
Attack. Please challenge
the best record.
Attachments:

Thanks for the words of encouragement, elreins. 
Preliminary English Translations for Page 5 of the Instruction Booklet:
タイトル画面の時に右+ボタン左、Bボタン、右+ボタン下、Aボタン、右+ボタン上
でアライメント検査画面になります。 (くわしい調整については、 バーチャルボーイ
本体取扱説明書をお読み下さい。) STARTボタンを押すと、タイトル画面に戻ります。
At the title screen, press left on the right control pad, the B button, down on the right control pad, the A button, and up on the right control pad to switch to the alignment inspection screen. (For more information about adjustments, please read the instruction manual for the Virtual Boy itself.) Press the START button to return to the title screen.
[In the left red bar]
Lトリガーボタン
L Trigger Button
[Beneath the above]
★ビームの発射
★Fires the beams
[In the right red bar]
Rトリガーボタン
R Trigger Button
[Beneath the above]
★ビームの発射
★Fires the beams
Attachments:

Preliminary English Translations for Page 4 of the Instruction Booklet:
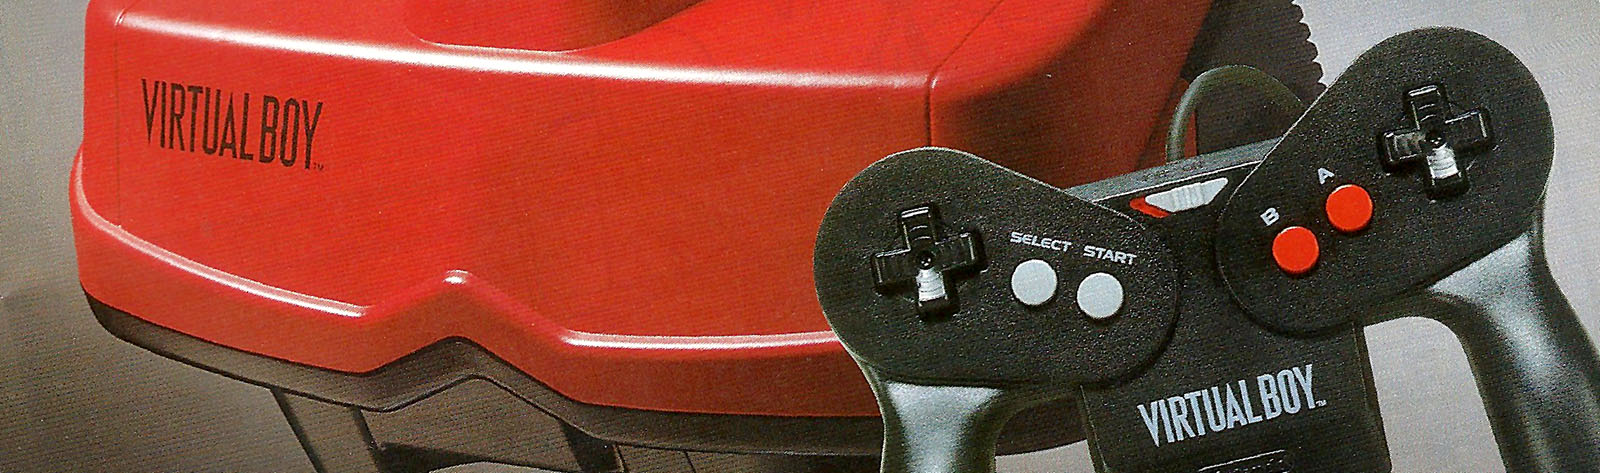
[In the blue bar near the top]
コントローラー操作方法
Controller Operation Method
[In the upper left red bar]
L+ボタン
Left Control Pad
[Beneath the above]
★ビーム砲の移動
★カーソルの移動
★選択の切り替え
★Moves the beam gun
★Moves the cursor
★Changes the selection
[In the middle left red bar]
SELECTボタン
SELECT Button
[Beneath the above]
★ポーズ中ピント
調節画面に切り替
えます。
★Switches to the
Focus Adjustment Screen
during a pause.
[In the red bar beneath the controller]
STARTボタン
START Button
[Beneath the above]
★ゲームスタート
★決定
★ポーズ ・ポーズの解除
★Starts the game
★Decides
★Pauses & cancels the pause
[In the upper right red bar]
電源スイッチ
Power Switch
[In the red bar beneath the above]
R+ボタン
Right Control Pad
[Beneath the above]
★ビーム砲の移動
★Moves the beam gun
[In the red bar beneath the above]
Aボタン
A Button
[Beneath the above]
★ビームの発射
★Fires the beams
[In the red bar beneath the above]
Bボタン
B Button
[Beneath the above]
★ビームの発射
★Fires the beams
[In the lower left red bar]
リセット
Reset
[Beneath the above]
ゲーム中にSTART、SELECT、Lトリガー、Rトリガーボタンを全部同時に押すと、ゲ
ームがリセットされます。
When the START & SELECT buttons and the L & R triggers are all pressed simultaneously
during the game, the game is reset.
Attachments:

Preliminary English Translations for Page 3 of the Instruction Booklet:
[In the blue bar near the top]
オートマティックポーズ機能について
About The Automatic Pause Function
[Right below the blue bar]
バーチャルボーイ専用カートリッジには、 プレイヤーの目の健康を寺るため、 適度な
時間でゲームを自動的に休止する 「オートマティックポーズ機能」 があります。
For the eye health of the player, all Virtual Boy exclusive-use cartridges have an “Automatic
Pause Function,” which automatically pauses the game after a reasonable amount of time.
[To the left of the upper two screenshots]
★調整画面で調整を終えた後、 STARTボタンを押すと右
の画面に切り替わります。 L+ボタンの左右で 「オート
マティックポーズ機能」 のON/OFFが選び、 STARTボ
タンを押すとデモが始まり、 さらに押すとタイトル画面
が現れます。
★ After finishing the adjustment in the adjustment screen, press the START
button to switch to the screen at right. With left and right on the left control
pad, you can turn the “Automatic Pause Function” on or off. When the
START button is pressed, a demo begins. If you press it again, the title
screen appears.
[To the left of the lowest screenshot]
★「スペースインベーダー バーチャルコレクション」 は電源
を入れた後、約30分おきにオートマティックポーズ機能
が働き、ポーズ (ー時中止) 状態となります。 適度な休憩
をとり目や体を休めてください。 STARTボタンを押すと、ゲームを再開できます。
★ In “Space Invaders Virtual Collection,” after the power is turned
on, the Automatic Pause Function activates about every 30 minutes,
which pauses (suspends) the game. Please take a reasonable break
and rest your eyes and body. When the START button is pressed, the game can be resumed.
Attachments:

I have bought a Flashboy+ from Richard and also several other items. I can personally say that I would trust Richard over many Ebay sellers. If Richard tells you that he will send you the item, he will ship it to you promptly, after he has already tested the item to make sure that it works properly. After that, it’s in the mail system’s hands.
Preliminary English Translations for Page 2 of the Instruction Booklet:
[In the blue bar near the top]
目の幅調整
Interpupillary Distance Adjustment
[To the left of the illustration]
プレイヤーの左目と右目の幅にバーチャルボーイ
内部の表示装置を合わせる調整です。
調整画面を見ながら、 本体上部にある 「目の幅調整ダ
イアル」 をまわし、 画面の4すみにあるマークが見え
る状態にあわせてください。
This is the adjustment that adjusts the display inside the Virtual
Boy to the width between the player’s left and right eyes.
While looking at the adjustment screen, please turn the “Interpupillary
Distance Adjustment Dial” located on top of the main body until you
can see a mark in all 4 corners of the screen.
[Right below the blue dotted line]
このように4すみのマークが見えるように
調整してください。
Please adjust it so that you can see a mark in each
of the 4 corners, like this:
[Beneath the above and to the left of the screenshot]
※4つのマークすべてが見えない揚合もありますが、
3つ見えていればゲームに支障はありません。
※ In some cases, all 4 marks may not be visible, but if
3 are visible, then it won’t interfere with the game.
[Right below the text mentioned above]
その他の調整については、 バーチャルボーイ本体取扱説明書をおよみください。
For other adjustments, please read the instruction manual of the Virtual Boy itself.
Attachments:

Preliminary English Translations for Page 1 of the Instruction Booklet:
[In the blue bar near the top]
ゲームを始める前に
Before Starting The Game
[Right below the blue bar]
ゲームをスタートする前に必ず次のような調整を
おこなってください。
Before you start the game, please be sure
to make the following adjustments.
[To the left of the upper screenshot]
バーチャルボーイ本体にカートリッジを正しくセッ
トしてください。 カートリッジをセット後、 コント
ローラの前面にある電源スイッチをONにすると、し
ばらくして右画面が現れます。
Please insert the cartridge properly into the main body of the
Virtual Boy. After inserting the cartridge, turn the POWER
switch located on the front of the controller to the ON position;
after a little while, the screen at right will appear.
[To the left of the lower screenshot]
STARTボタンを押すと 「目の幅調整画面」 に切り
替わります。 各調整はこの画面を見ながらおこない
ます。
When the START button is pressed, it changes to the
“Interpupillary Distance Adjustment Screen.” Each
adjustment can be made while looking at this screen.
Attachments:

That makes sense. I can understand why the heating might warp the plastic and cause the threads to be misaligned. I didn’t think that 200 degrees F for a couple of minutes every once and a while would permanently damage any of the other components of the displays, though.
Preliminary English Translations for the Contents Page of the Instruction Booklet:
★ごあいさつ★
このたびは、 (株)タイトーのバーチャルボーイ専用カートリッジ 「スペースインベーダー
バーチャルコレクション」 をお買い上げいただき、 まことにありがとうございました。
まずはじめに別冊の 「注意書」 をお読みいただき、 つぎにこの 「取扱説明書」 の指示に
従い、 各調整をおこなったうえ、 正しい使用方法でご愛用ください。 なお、 「注意書」お
よびこの「取扱説明書」は、 大切に保管してくださるようお願いいたします。
★Greetings★
Thank you very much for purchasing Taito Co., Ltd.’s Virtual Boy exclusive-use cartridge
“Space Invaders Virtual Collection.” Please read the separate “Precautions Booklet” first.
Next, make each adjustment by following the instructions of this “Instruction Booklet.” Please
regularly use this product with the proper use method. Furthermore, we encourage you to
keep the “Precautions Booklet” and this “Instruction Booklet” in a safe place.
[Starting from the top of the left side of the CONTENTS table and going down]
ゲームを始める前に
Before Starting The Game
目の幅調整
Interpupillary Distance Adjustment
オートマティックポーズ機能について
About The Automatic Pause Function
コントローラーの操作方法
Controller Operation Method
ゲームの遊び方
How To Play The Game
[Starting from the top of the right side of the CONTENTS table and going down]
オリジナルモード・バーチャルモード
Original Mode & Virtual Mode
基本ルール (パートI)
Basic Rules (Part I)
基本ルール (パートII)
Basic Rules (Part II)
チャレンジモード
Challenge Mode
ネーム登録
Name Registration
Attachments:

Turning the IPD dial all the way to the left (as counterclockwise as you possibly can) is a recommendation for long-term storage, so that unnecessary strain isn’t put on the display cables, which can easily separate from the PCBs inside the Virtual Boy. Thus, if you are not going to use your Virtual Boy for any length of time, simply turn the IPD dial counterclockwise until you can turn it no more, and keep it like that until you use it again. Of course, if this setting isn’t comfortable on your eyes for use, you can adjust it to what is comfortable for you when you use it, but once you are done, turn it completely counterclockwise or all the way to the left, however you want to state it.
As far as I know, you don’t have to worry about the position of the FOCUS slider when storing your Virtual Boy, as this slider has no effect on the position of the display cables. Thus, you can keep the FOCUS slider, which slides left and right and does not turn, in whatever position you want.
Yeah… the biggest thing that worries me about the Solder Method is the possibility of messing up the alignment of the copper threads, which one doesn’t really have to worry about with the Oven Method, if one performs the Oven Method carefully.
In what ways, however, can using the Oven Method too many times permanently screw up the displays? Does simply heating the displays to 200 degrees F too many times eventually cause permanent damage to the displays? If so, what in particular gets damaged and can never be fixed? Also, is there a “dangerous” temperature that one should never reach when using the Oven Method. If so, what temp would that be?
Preliminary English Translations for the Cover Page of the Instruction Booklet:
[Above “TAITO”]
キヤツチ ・ザ ・ハート
Catch the Heart
[Beneath “SPACE INVADERS VIRTUAL COLLECTION”]
スペースインベーダー バーチャルコレクション
Space Invaders Virtual Collection
[Beneath the above]
バーチャルボーイTM専用カートリッジ
VIRTUAL BOY TM EXCLUSIVE-USE CARTRIDGE
[Beneath the above]
取扱説明書
INSTRUCTION BOOKLET
Attachments:

Preliminary English Translations for the Back of the Box:
[At the very top, in blue]
飛び出す!
インベーダー
Pop out!
Invaders
[Beneath the above, in green]
立体感のある
新作ゲームになって登場!
A new game having stereoscopic effects has appeared!
[Beneath the above, in black]
ゲームモードは、 3種類。 今までのインベー
ダーが楽しめるオリジナルモード。 奥行き
のある新感覚のバーチャルモード。 クリア
タイムやスコアに挑戦するチャレンジモ
ードが楽しめます。
オリジナルモードとバーチャルモードでは、
パートIとパートIIのインベーダーが遊べます。
There are 3 different game modes. You can enjoy
Original Mode, which is classic Invaders, Virtual
Mode, which has a new sense of depth, and
Challenge Mode, where you try the Time Attack
and Score Attack challenges.
In Original Mode and Virtual Mode, you can
play Invaders Part I and Part II.
[Beneath the uppermost screenshot]
バーチャルモード
Virtual Mode
[Beneath the middle screenshot]
オリジナルモード
Original Mode
[Beneath the lowermost screenshot]
チャレンジモード
Challenge Mode
[Inside the yellow bar]
ご注意
Caution
[In the white field beneath the yellow bar]
(Translator’s Note: This is the exact same text that appears on the back of the boxes for V-Tetris and Virtual Bowling, games whose information I already translated and posted on this site. My translation below is probably my final English version of this information, as I am now rather confident of and happy with the current translation. Since my translation for Virtual Bowling, I’ve only made a minor change to the 4th bullet point.)
●ご使用になる方及び保護者は、 注意書及び取扱説明
書を必ず読んでから使用してください。
●バーチャルボーイは必ず屋内で使用してください。
●長時間ゲームをするときは、 適度に休憩してください。
●疲れた状態や連続して長時間にわたるご使用は、 健
康上好ましくありませんので避けてください。
●バーチャルボーイは適切な調整をした上で使用して
ください。
●目の成長過程にある0才から6才までは、 使用をご
遠慮ください。
●Those, and the guardians of those, who are intending to use this product: Please
be sure to read the instruction booklet and precautions booklet before use.
●The Virtual Boy is for indoor use only.
●Please take appropriate breaks when playing for longer periods of time.
●Please avoid prolonged and continuous use and playing when tired, because with
regard to health, it is undesirable.
●Please use the Virtual Boy only after making the appropriate adjustments.
●This product must not be used by anyone whose eyes are 0 to 6 years into their growth process.
[Below the white field mentioned above, at the very bottom of the box]
*揚合によっては、 バーチャルボーイで立体に見えない人がいます。
*In some cases, some people may not see three-dimensionally with the Virtual Boy.
[To the left of the yellow bar]
株式会社 タイトー
Taito Co., Ltd.
[Beneath the above]
本社 : 〒102 東京都千代田区平河町2-5-3
Headquarters: 2-5-3 Hirakawacho, Chiyoda-ku, Tokyo 102, Japan.
Attachments:

I am happy to be able to say that I am another satisfied user of the Oven Method for fixing basically ANY kind of Virtual Boy display problem, such method being described in detail by DogP here:
http://home.comcast.net/~virtual.boy/projectvb/displayfix.html
If you are new to this site and are having any kind of display problems with your Virtual Boy… any kind at all… don’t get discouraged and don’t go buying another Virtual Boy before you’ve at least tried the Oven Method for fixing your Virtual Boy. As far as I know, there are only 2 methods that have been given for fixing any kind of Virtual Boy display problem at all, which should work in just about any case, unless you truly have a Virtual Boy that was ever ripped apart and smashed or somehow internally damaged by something more than just a good drop. The Oven Method is said to be a temporary fix, but it is very easy, and just about anyone should be able to do it and repeat it if and when it is necessary, in order to keep one’s Virtual Boy gaming going for the long run. I can’t attest to the Solder Method yet, but others can, and they also say that it is a permanent fix, but it looks a lot more difficult for the average person/gamer.
One thing that I can definitely say with regard to the Oven Method is that the motto: “If at first you don’t succeed, try, try again!” works here. I got to the point in the instructions where it reads “Immediately after removing the displays from the oven, flip them over and rub the back of the cables to the PCB to ensure a good bond.” I had preheated my oven to 200 degrees F and waited until the cables on both displays were lying flat, removed them from the oven, and then firmly pressed the back of the cables to the PCBs with my thumb for probably a good minute and a half or so. To the naked eye, it looked like everything was bonded well, so I reinforced the cables with a thin strip of clear packing tape and then put the displays back into the proper spots in the Virtual Boy.
Here is where I make a suggestion: do not put any of the 12 screws back into the Virtual Boy before testing your Virtual Boy to see if any glitches still appear in the faulty display(s). I simply put the large black bottom half of the Virtual Boy back on (without the bottom plate that attaches to the stand) and held everything in place with one hand, while plugging in my controller and AC adapter, and then I inserted a game into the open game slot and turned the system on. Prior to this, I had been having problems where my right screen would sometimes go all crazy and get distorted and sometimes go out entirely. Now, such problems were gone, but I had the new problem of the horizontal lines. I closed my right eye and saw with my left eye that the left screen was perfect, closed my left eye and saw with my right eye that it was the right screen alone that was now giving me horizontal lines, so I simply repeated the Oven Method for the right display only. It was only about 5 minutes after I had done the Oven Method on both displays initially, and I simply took the packing tape off of the right display and put the right display back into the 200 degree F oven and waited for another 2 minutes (waiting for the cables to lie flat no longer applied, since they were still soft from before). After the 2 minutes were up, I took the display out and, once again, pressed the back of the cables to the PCB for probably a good minute or two. Again, everything looked good and well-bonded to the naked eye, and I put another piece of packing tape around the cable. I put the large, bottom half piece of the Virtual Boy back on and held everything in place with one hand again, plugged the controller/adapter back in, inserted the game into the open slot, turned it on and… again… there were horizontal lines in the right display, but only about half as many this time. Seeing that I was getting somewhere, I repeated the same process once again, and after this 3rd time of putting the right display in the 200 degree F oven for about 2 minutes (after I had taken the packing tape off again), firmly pressing the back of the cables to the PCB for a minute or so, tightly placing another piece of packing tape around the cable, and reinstalling the display, I now have a Virtual Boy that gives me no display problems.
I don’t expect that this will last forever, but it is now something very simple and quick that I can always repeat if and when my Virtual Boy gives me problems in the future, and I strongly suggest to anyone who has never tried something like this before to just go ahead and give it a shot before buying another Virtual Boy, because in time (assuming you are a dedicated Virtual Boy fan), you will, more likely than not, have to do the same thing to whatever additional Virtual Boy you receive.
Now, I just have to see how long this method’s fix will last and how long it will take before I decide that I just have to attempt the Solder Method for a permanent fix.
Preliminary English Translations for the Back Page of the Instruction Booklet:
[At the very top, to the right of VIRTUAL BOY TM]
バーチャルボーイTMは任天堂の商標です。
VIRTUAL BOY TM IS A TRADEMARK OF NINTENDO.
[Beneath “FOR SALE AND USE IN JAPAN ONLY…”]
本品は日本国内だけの販売および使用とし、
また商業目的の賃貸は禁止されています。
This product is for sale and use in Japan only;
in addition, commercial rental is prohibited.
(Translator’s Note: My OCR program can’t convert the characters in the upper right corner of the page. If someone would like to inform us of what it says, along with the information to the right of “Athena,” please feel free to do so.)
Attachments:

Preliminary English Translations for Page 17 of the Instruction Booklet:
フレーム
1ゲームは10の投球枠からなっています。
その投球枠をフレームといいます。
Frame – One game consists of 10 bowling parts. One bowling part is called a frame.
ポケット
ストライクを取るために狙う場所のこと。
右利きの人は1番と3番ピンの間。
左利きの人は1番と2番ピンの間。
Pocket – It’s the place where you aim to get a strike. For a right-hander, it’s between the 1 and 3 pin. For a left-hander, it’s between the 1 and 2 pin.
スプラッシュ
10本のピンが、 一気にはじけ飛ぶような、
ストライクのこと。
Splasher – A strike where the 10 pins fly off all at once.
シュライファ一
1番ピンに軽く当たってピンがー本ー本倒れて
いくストライクのこと。
Schleifer – A strike where the 1 pin is hit lightly and the pins fall one by one.
Attachments:

Preliminary English Translations for Page 16 of the Instruction Booklet:
ボウリング用語豆辞典
Bowling Terminology Dictionary
サンドウイッチ
ゲーム
ストライクとスペアが交互に続いて、 ゲームを
終了すること。 スコアは200点となったゲーム。
Sandwich Game – Alternately getting strikes and spares and then ending the game. The game score is 200 points.
パーフェクト
ゲーム
ストライクを12回連続してゲームを終了すること。
スコアは300点になります。
Perfect Game – Ending the game with 12 consecutive strikes. The score is 300 points.
ダブル
2回連続してストライクを出すこと。
Double – Getting 2 consecutive strikes.
ターキー
3回連続してストライクを出すこと。 ターキーを
出すと、 楽しい画面が見られるかも・・・。
Turkey – Getting 3 consecutive strikes. When you get a turkey, a fun screen can be seen….
フォア・タイマー
4回連続してストライクを出すこと。
Four-timer – Getting 4 consecutive strikes.
Attachments:

Preliminary English Translations for Page 15 of the Instruction Booklet:
ボウリング用語豆辞典
Bowling Terminology Dictionary
オープンフレーム
ストライクもスペアもとれなかった
フレームのこと。
Open Frame – A frame in which no spare or strike is made.
グラスホッパー
破壊力のあるボールのこと。
Grasshopper – A ball that has destructive power.
スプリット
1投目が終わった時点で、 スペアをとるのが
非常に難しいピンの残り方。
Split – When the first throw is ended and the remaining pins make it very difficult to get a spare.
スペア
2度目の投球で、 10本のピンを全部倒して
しまうこと。
Spare – When all 10 pins are down after the second throw.
スピン
ボールに回転をかけること。
スピンによって、 ボールに威力がでます。
Spin – Putting rotation on the ball. With spin, you get power on the ball.
Attachments:

Preliminary English Translations for Page 14 of the Instruction Booklet:
[To the left of the upper screenshot]
●トレーニングモード
プレイヤーは自分の好きなようにピンの
本数・配置を決める事ができます。 左+
字キーでピンの選択、 Aボタンでピンの
有無を設定できます。 スコアには関係な
く、 何回でも投球できます。
●Training Mode
Here, the number and arrangement of the pins can be
determined at the discretion of you, the player. Select
a pin location with the left control pad and determine
whether or not there is a pin with the A button. Regardless
of your score, you can bowl any number of times.
[Beneath the upper screenshot]
苦手な位置にピンを配置させ、 うまく倒せるまで練習したり、 自分なりの
ストライクコースを探しだしたりと、 いろいろな楽しみ方があります。
There are various ways to enjoy this. Arrange the pins in positions that you’re poor at and
practice until you can knock them down well, or search out your own strike course, etc.
[Beneath the lower screenshots]
視点をずらしてみいると…。
When the point of view is shifting….
